Server-sent events
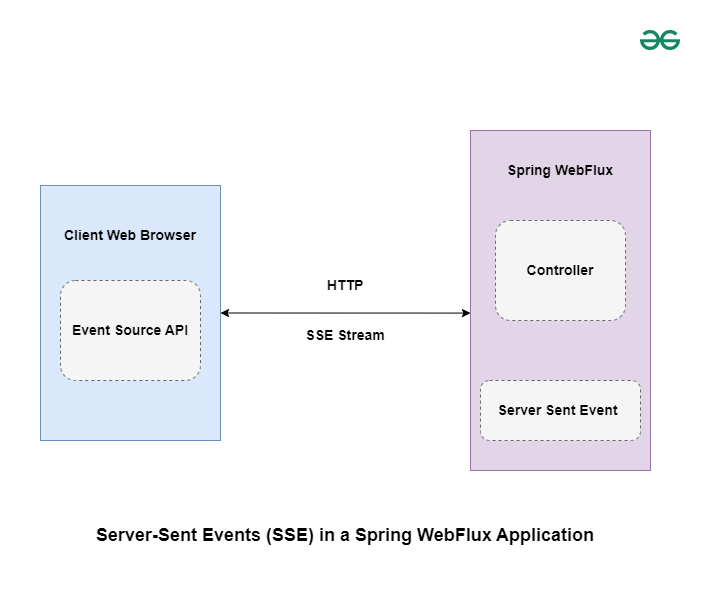
(SSE) are standards that define how servers can start sending data to clients. Once an initial client connection has been established, in the context of Spring WebFlux, SSE allows you to send a stream of updates from the server to the client over HTTP.
SSE works over a single HTTP connection where the server continuously sends data to the client. Whenever there's new data available on the server, it sends an event to the client. The client receives these events and can react to them accordingly. The client establishes an HTTP connection to the server, and the server keeps the connection open indefinitely.
Key Features of SSE:
Text-Based:
SSE sends data as text usually in UTF-8 making it easy to consume with JavaScript.
Event Stream Format:
SSE uses a simple text-based format where each event is represented by a set of fields like data, events, ID, and others.
Automatic Re-connection:
If the connection is closed, the client automatically tries to reconnect after a certain interval.
Built-in Retry Mechanism:
SSE includes a built-in mechanism for handling re-connection attempts with an optional retry timeout.
Steps to Implement Server-Sent Events (SSE) in Spring WebFlux
Here, we created one simple spring reactive project after that we created one controller class for defining the business logic and defining API endpoints. Below, we provide a in detail explanation with examples for a better understanding of the concept.
Step 1:
Create a Spring Starter Project
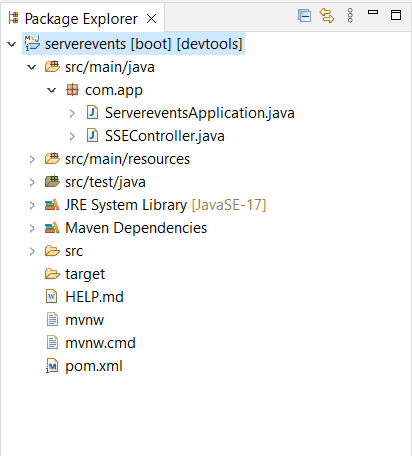
Create a Spring Stater project with required dependencies. In the above, we provide those dependencies that we use in that spring project. Below, we provide the project folder structure.
Project Structure:
Step 2:
Create a Controller Class
Now create one class with the help of @
RestConfiguration
annotation. This class can handle the business logic-related functions in the Application. And also define the API endpoints in this class.
SSEController.java:
packagecom.app;importorg.springframework.http.codec.ServerSentEvent;importorg.springframework.web.bind.annotation.GetMapping;importorg.springframework.web.bind.annotation.RestController;importreactor.core.publisher.Flux;importjava.time.Duration;importjava.time.LocalDateTime;@RestControllerpublicclassSSEController{@GetMapping("/events")publicFlux<ServerSentEvent<String>>getEvents(){returnFlux.interval(Duration.ofSeconds(1)).map(sequence->ServerSentEvent.<String>builder().id(String.valueOf(sequence)).event("message").data("Event #"+sequence+" at "+LocalDateTime.now()).build());
In the above java class, first we created a API endpoint by using @GetMapping.
After that we define a API endpoint method with the help of Flux publisher.
And, in this getEvents method we return the a flux of events.
These events contains information like event is, message, date and time of event.
Step 3: Run the Project
Once development is completed, then run this project as Spring Boot App and by default this Spring WebFlux project running Netty server on port number 8080.
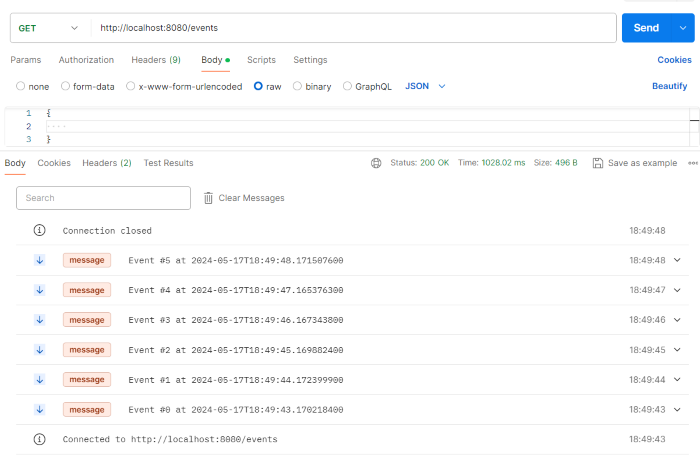
Step 4: Test the API
Now test the API endpoint. Here, we use the Postman tool for API testing.
5 min read
We use cookies to ensure you have the best browsing experience on our website. By using our site, you
acknowledge that you have read and understood our
Cookie Policy
&
Privacy Policy
Cookies are not collected in the GeeksforGeeks mobile applications.
Got It !