在前一篇文章
【深度域自适应】一、DANN与梯度反转层(GRL)详解
中,我们主要讲解了DANN的网络架构与梯度反转层(GRL)的基本原理,接下来这篇文章中我们将主要复现DANN论文
Unsupervised Domain Adaptation by Backpropagation
中MNIST和MNIST-M数据集的迁移训练实验。
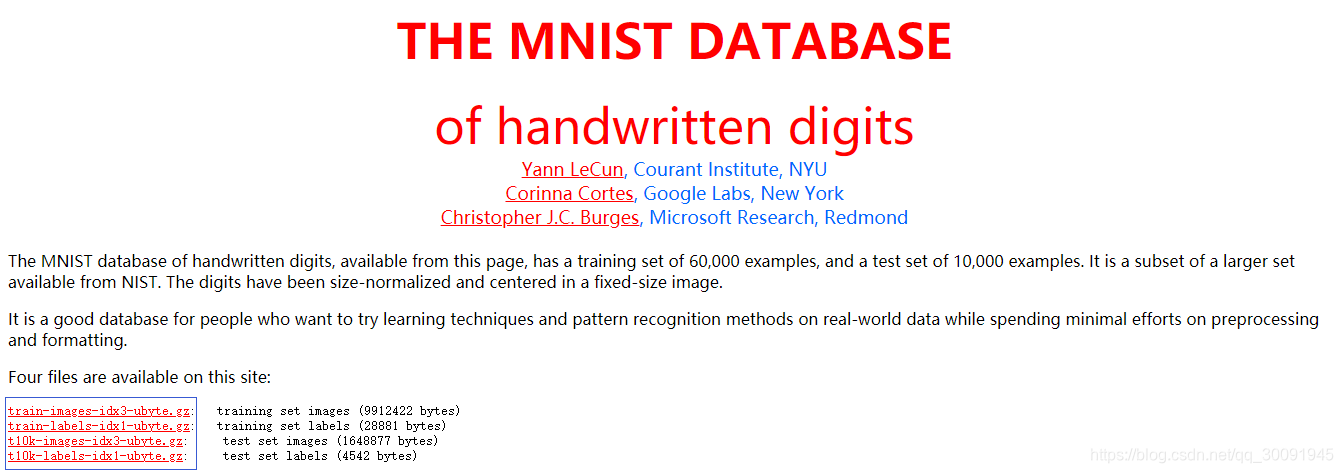
为了利用DANN实现MNIST和MNIST-M数据集的迁移训练,我们首先需要获取到MNIST和MNIST-M数据集。其中MNIST数据集很容易获取,官网下载链接为:
MNSIT
。需要下载的文件如下图所示蓝色的4个文件。

由于tensorflow和keras深度融合,我们可以通过keras的相关API进行MNIST数据集,如下:
from tensorflow.keras.datasets import mnist
(X_train,y_train),(X_test,y_test) = mnist.load_data()
MNIST-M数据集由MNIST数字与BSDS500数据集中的随机色块混合而成。那么要像生成MNIST-M数据集,请首先下载BSDS500数据集。BSDS500数据集的官方下载地址为:BSDS500。
以下是BSDS500数据集官方网址相关截图,点击下图中蓝框的连接即可下载数据。

下载好BSDS500数据集后,我们必须根据MNIST和BSDS500数据集来生成MNIST-M数据集,生成数据集的脚本create_mnistm.py如下:
from __future__ import absolute_import
from __future__ import division
from __future__ import print_function
import os
import tarfile
import numpy as np
import pickle as pkl
import skimage.io
import skimage.transform
from tensorflow.keras.datasets import mnist
rand = np.random.RandomState(42)
def compose_image(mnist_data, background_data):
这是将MNIST数据和BSDS500数据进行融合成MNIST-M数据的函数
:param mnist_data: MNIST数据
:param background_data: BDSD500数据,作为背景图像
:return:
w, h, _ = background_data.shape
dw, dh, _ = mnist_data.shape
x = np.random.randint(0, w - dw)
y = np.random.randint(0, h - dh)
bg = background_data[x:x + dw, y:y + dh]
return np.abs(bg - mnist_data).astype(np.uint8)
def mnist_to_img(x):
这是实现MNIST数据格式转换的函数,0/1数据位转化为RGB数据集
:param x: 0/1格式MNIST数据
:return:
x = (x > 0).astype(np.float32)
d = x.reshape([28, 28, 1]) * 255
return np.concatenate([d, d, d], 2)
def create_mnistm(X,background_data):
这是生成MNIST-M数据集的函数,MNIST-M数据集介绍可见:
http://jmlr.org/papers/volume17/15-239/15-239.pdf
:param X: MNIST数据集
:param background_data: BSDS500数据集,作为背景
:return:
X_ = np.zeros([X.shape[0], 28, 28, 3], np.uint8)
for i in range(X.shape[0]):
if i % 1000 == 0:
print('Processing example', i)
bg_img = rand.choice(background_data)
mnist_image = mnist_to_img(X[i])
mnist_image = compose_image(mnist_image, bg_img)
X_[i] = mnist_image
return X_
def run_main():
这是主函数
BST_PATH = os.path.abspath('./model_data/dataset/BSR_bsds500.tgz')
mnist_dir = os.path.abspath("model_data/dataset/MNIST")
mnistm_dir = os.path.abspath("model_data/dataset/MNIST_M")
(X_train,y_train),(X_test,y_test) = mnist.load_data()
f = tarfile.open(BST_PATH)
train_files = []
for name in f.getnames():
if name.startswith('BSR/BSDS500/data/images/train/'):
train_files.append(name)
print('Loading BSR training images')
background_data = []
for name in train_files:
try:
fp = f.extractfile(name)
bg_img = skimage.io.imread(fp)
background_data.append(bg_img)
except:
continue
print('Building train set...')
train = create_mnistm(X_train,background_data)
print(np.shape(train))
print('Building validation set...')
valid = create_mnistm(X_test,background_data)
print(np.shape(valid))
X_train = np.expand_dims(X_train,-1)
X_test = np.expand_dims(X_test,-1)
X_train = np.concatenate([X_train,X_train,X_train],axis=3)
X_test = np.concatenate([X_test,X_test,X_test],axis=3)
y_train = np.array(y_train).astype(np.int32)
y_test = np.array(y_test).astype(np.int32)
if not os.
path.exists(mnist_dir):
os.mkdir(mnist_dir)
with open(os.path.join(mnist_dir, 'mnist_data.pkl'), 'wb') as f:
pkl.dump({'train': X_train,
'train_label': y_train,
'val': X_test,
'val_label':y_test}, f, pkl.HIGHEST_PROTOCOL)
if not os.path.exists(mnistm_dir):
os.mkdir(mnistm_dir)
with open(os.path.join(mnistm_dir, 'mnist_m_data.pkl'), 'wb') as f:
pkl.dump({'train': train,
'train_label':y_train,
'val': valid,
'val_label':y_test}, f, pkl.HIGHEST_PROTOCOL)
print(np.shape(X_train))
print(np.shape(X_test))
print(np.shape(train))
print(np.shape(valid))
print(np.shape(y_train))
print(np.shape(y_test))
pixel_mean = np.vstack([X_train,train,X_test,valid]).mean((0,1,2))
print(np.shape(pixel_mean))
print(pixel_mean)
if __name__ == '__main__':
run_main()
由于整个DANN-MNIST网络的训练过程中涉及到很多超参数,因此为了整个项目的编程方便,我们利用面向对象的思想将所有的超参数放置到一个类中,即参数配置类config。这个参数配置类config的代码如下:
import os
class config(object):
__defualt_dict__ = {
"pre_model_path":None,
"checkpoints_dir":os.path.abspath("./checkpoints"),
"logs_dir":os.path.abspath("./logs"),
"config_dir":os.path.abspath("./config"),
"image_input_shape":(28,28,3),
"image_size":28,
"init_learning_rate": 1e-2,
"momentum_rate":0.9,
"batch_size":256,
"epoch":500,
"pixel_mean":[45.652287,45.652287,45.652287],
def __init__(self,**kwargs):
这是参数配置类的初始化函数
:param kwargs: 参数字典
self.__dict__.update(self. __defualt_dict__)
self.__dict__.update(kwargs)
if not os.path.exists(self.checkpoints_dir):
os.makedirs(self.checkpoints_dir)
if not os.path.exists(self.logs_dir):
os.makedirs(self.logs_dir)
if not os.path.exists(self.config_dir):
os.makedirs(self.config_dir)
def set(self,**kwargs):
这是参数配置的设置函数
:param kwargs: 参数字典
:return:
self.__dict__.update(kwargs)
def save_config(self,time):
这是保存参数配置类的函数
:param time: 时间点字符串
:return:
self.checkpoints_dir = os.path.join(self.checkpoints_dir,time)
self.logs_dir = os.path.join(self.logs_dir,time)
self.config_dir = os.path.join(self.config_dir,time)
if not os.path.exists(self.config_dir):
os.makedirs(self.config_dir)
if not os.path.exists(self.checkpoints_dir):
os.makedirs(self.checkpoints_dir)
if not os.path.exists(self.logs_dir):
os.makedirs(self.logs_dir)
config_txt_path = os.path.join(self.config_dir,"config.txt")
with open(config_txt_path,'a') as f:
for key,value in self.__dict__.items():
if key in ["checkpoints_dir","logs_dir","config_dir"]:
value = os.path.join(value,time)
s = key+": "+value+"\n"
f.write(s)
在DANN中比较重要的模块就是梯度反转层(Gradient Reversal Layer, GRL)的实现。GRL的tf2.x代码实现如下:
import tensorflow as tf
from tensorflow.keras.layers import Layer
@tf.custom_gradient
def gradient_reversal(x,alpha=1.0):
def grad(dy):
return -dy * alpha, None
return x, grad
class GradientReversalLayer(Layer):
def __init__(self,**kwargs):
这是梯度反转层的初始化函数
:param kwargs: 参数字典
super(GradientReversalLayer,self).__init__(kwargs)
def call(self, x,alpha=1.0):
这是梯度反转层的初始化函数
:param x: 输入张量
:param alpha: alpha系数,默认为1
:return:
return gradient_reversal(x,alpha)
在上述代码中@ops.RegisterGradient(grad_name)修饰 _flip_gradients(op, grad)函数,即自定义该层的梯度取反。同时gradient_override_map函数主要用于解决使用自己定义的函数方式来求梯度的问题,gradient_override_map函数的参数值为一个字典。即字典中value表示使用该值表示的函数代替key表示的函数进行梯度运算。
DANN论文Unsupervised Domain Adaptation by Backpropagation中给出MNIST和MNIST-M数据集的迁移训练实验的网络,网络架构图如下图所示。

接下来,我们将利用tensorflow2.4.0来搭建整个DANN-MNIST网络,DANN-MNIST网络结构代码如下:
import tensorflow as tf
from tensorflow.keras.layers import Dense
from tensorflow.keras.layers import Conv2D
from tensorflow.keras.layers import Flatten
from tensorflow.keras.layers import MaxPool2D
from tensorflow.keras.layers import Activation
def build_feature_extractor():
这是特征提取子网络的构建函数
:param image_input: 图像输入张量
:param name: 输出特征名称
:return:
model = tf.keras.Sequential([Conv2D(filters=32, kernel_size=5,strides=1),
Activation('relu'),
MaxPool2D(pool_size=(2, 2), strides=2),
Conv2D(filters=48, kernel_size=5,strides=1),
Activation('relu'),
MaxPool2D(pool_size=(2, 2), strides=2),
Flatten(),
return model
def build_image_classify_extractor():
这是搭建图像分类器模型的函数
:param image_classify_feature: 图像分类特征张量
:return:
model = tf.keras.Sequential([Dense(100),
Activation('relu'),
Dense(100,activation='relu'),
Dense(10,activation='softmax',name="image_cls_pred"),
return model
def build_domain_classify_extractor():
这是搭建域分类器的函数
:param domain_classify_feature: 域分类特征张量
:return:
model = tf.keras.Sequential([Dense(100),
Activation('relu'),
Dense(2, activation='softmax', name="domain_cls_pred")
return model
下面主要包括了MNIST和MNIST-M数据集在自适应训练过程中学习率、梯度反转层参数
λ在训练过程中的数据可视化。

接着是训练数据集和验证数据集的图像分类精度和域分类精度在训练过程中的数据可视化,其中蓝色代表训练集,红色代表验证集。训练精度是在源域数据集即MNIST数据集上的统计结果,验证精度是在目标域数据集即MNIST-M数据集上的统计结果。 由于RTX30显卡的精度高,MNIST和MNIST-M数据集的自适应训练的训练结果稳定在86%左右,比原始论文的81.49%精度高出不少也就在情理之中。

最后是训练数据集和验证数据集的图像分类损失和域分类损失在训练过程中的数据可视化,其中蓝色代表训练集,红色代表验证集。

最初实现DANN使用tf1.x框架,后期发现由于GRL的特殊性,tf1.和GRL与复杂网络结构,如YOLO v3之间的适配度较低,因此现已将代码全面升到tf2.x,未如有需要也会支持pytorch。原始tf1.x的项目代码地址为:DANN-MNIST的tf1分支,tf2.x的项目代码地址如下:
欢迎大家在CSDN和Github上一键三连
创建一个虚拟环境python -m venv .venv
激活虚拟环境.venv\Scripts\activate (Windows)| source .venv/bin/activate (Linux,Mac)
安装依赖项pip install -r requirements.txt
创建迁移python manage.py makemigrations
迁移到数据库python manage.py migrate
运行服务器python manage.py runserver
train/loss/LP :标签预测器损失train/loss/DC :域分类器损失
打开train.py并更改data_root路径。 运行python train.py 。
从图像文件所在的目录中获取类标签,并且目录名称必须是类ID。 因此,必须安排图像文件并为每个类重命名目录。
mnist官方的数据不是图片格式的,现将t10k-images-idx3-ubyte train-images-idx3-ubyte t10k-labels-idx1-ubyte train-labels-idx1-ubyte转换成png图片格式,分类放入对应的目录中,目录结构如下:
/mnist$ tree -d
├── test
│ ├── 0
│ ├── 1
│ ├── 2
│ ├── 3
│ ├── 4
│ ├── 5
│ ├── 6
│ ├── 7
│ ├── 8
│ └── 9
└── train
├── 0
├── 1
├── 2
├── 3
├── 4
├── 5
├── 6
├── 7
├── 8
└── 9
当千辛万苦装好anaconda(https://blog.csdn.net/lxy_2011/article/details/79181990?utm_source=blogxgwz31) ,在开好环境,在环境里面装好所有包之后,开始试用案例 tensorflow 官网介绍的
MNIST 数据集已经是一个被”嚼烂”了的数据集, 很多教程都会对它”下手”, 几乎成为一个 “典范”. 不过有些人可能...
Domain Adaptation
现有深度学习模型都不具有普适性,即在某个数据集上训练的结果只能在某个领域中有效,而很难迁移到其他的场景中,因此出现了迁移学习这一领域。其目标就是将原数据域(源域,source domain)尽可能好的迁移到目标域(target domain),Domain Adaptation任务中往往源域和目标域属于同一类任务,即源于为训练样本域(有标签),目标域为测集域,其测试集域无标签或只有少量标签,但是分布不同或数据差异大,具体根据这两点可以划分为:
homogeneous .
这个数据集是在mnist原数据集上扩出来的,它包含MNIST数字(来自Keras)和BSDS500数据集中的随机色块。原始下载URL:https://github.com/VanushVaswani/keras_mnistm/releases/download/1.0/keras_mnistm.pkl.gz
此处搬运,方便国内同学使用。
Pytorch-CycleGAN-Digits
针对MNIST,USPS,SVHN,MNIST-M和SyntheticDigits数据集的CycleGAN的Pytorch实现。
更改DB变量以更改数据集。 要使用保存的模型生成图像,请将LOAD_MODEL设置为True,将EPOCHS设置为0。
生成的样本
http://yann.lecun.com/exdb/mnist/
http://yann.lecun.com/exdb/mnist/train-images-idx3-ubyte.gz
http://yann.lecun.com/exdb/mnist/train-labels-idx1-ubyte.gz
http://yann.lecun.com/exdb/mnist/t10...
DANN(Domain Adversarial Neural Network)是一种可以用于域自适应学习的神经网络模型,能够处理不同领域之间的数据差异。在使用DANN进行图像分类时,需要先准备好自定义数据集。
以下是一些准备自定义数据集的步骤:
1. 收集图像数据。可以从互联网上下载标注好的数据集,或者自己收集并标注数据。
2. 将数据集分成训练集和测试集。通常训练集占总数据集的70%~80%,测试集占20%~30%。
3. 对图像进行预处理。可以使用Python中的Pillow或OpenCV库来对图像进行缩放、裁剪、旋转、翻转等处理。
4. 创建标签。需要为每张图像创建一个标签,表示该图像所属的类别。
5. 划分域。如果需要进行域自适应学习,则需要将数据集划分成多个域,每个域之间具有不同的数据分布。
6. 将数据转换成模型需要的格式。一般来说,需要将图像转换成张量,同时对标签进行编码。
接下来,可以使用Python中的PyTorch或TensorFlow框架来构建DANN模型,并在自定义数据集上进行训练和测试。在训练过程中,可以使用交叉验证等方法来优化模型的超参数,提高分类准确率。