注: 开启后初始状态为Testing,测试完毕后需要点击PUBLISH APP来发布。由于Gmail属于用户敏感信息,必须向Google提交申请才能用于生产环境。如果仅仅是个人使用,保持Testing状态即可。
4.创建OAuth2.0: 在
Credentials
页面新建一个OAuth 2.0 Client ID

点击DOWNLOAD JSON将client secret下载到本地,此时假设JSON将client secret的路径是/path/to/client_secret.json。
5.配置环境: 基于Python3.8创建一个虚拟环境并安装以下依赖
pip install google-api-python-client==2.116.0
pip install google-auth-oauthlib==1.2.0
6.编写脚本: 使用client secret路径/path/to/client_secret.json来初始化GoogleEmail类即可
import os
import sys
import base64
import logging
import traceback
from email import encoders
from types import TracebackType
from email.mime.text import MIMEText
from email.mime.base import MIMEBase
from googleapiclient.discovery import build
from email.mime.multipart import MIMEMultipart
from google.oauth2.credentials import Credentials
from google.auth.transport.requests import Request
from google_auth_oauthlib.flow import InstalledAppFlow
logging.basicConfig(level=logging.INFO)
class GoogleEmail:
def __init__(self, client_secret_path: str = "") -> None:
Initialize an instance of the GoogleEmail class.
Args:
client_secret_path (str): The path of the client secret json file. Defaults to "".
Returns:
self._client_secret_path = client_secret_path
self._gmail_service = None
self._init()
def _init(self) -> None:
Initialize the gmail_service.
Returns:
tmp_dir = os.path.join(os.path.dirname(__file__), "tmp")
os.makedirs(tmp_dir, exist_ok=True)
google_token_path = os.path.abspath(os.path.join(tmp_dir, "google_email_token.json"))
credentials = None
if os.path.exists(google_token_path):
try:
credentials = Credentials.from_authorized_user_file(
filename=google_token_path,
scopes=["https://www.googleapis.com/auth/gmail.send"]
except Exception as e:
logging.error(f"{e}\n{traceback.format_exc()}")
sys.exit(1)
if not credentials or not credentials.valid:
if credentials and credentials.expired and credentials.refresh_token:
credentials.refresh(Request())
else:
flow = InstalledAppFlow.from_client_secrets_file(
client_secrets_file=self._client_secret_path,
scopes=["https://www.googleapis.com/auth/gmail.send"]
try:
credentials = flow.run_local_server(port=0)
except Exception as e:
logging.error(f"{e}\n{traceback.format_exc()}")
sys.exit(1)
with open(google_token_path, "w") as f:
f.write(credentials.to_json())
self._gmail_service = build("gmail", "v1", credentials=credentials)
def send(self,
subject: str,
body: str,
to_recipients: str,
cc_recipients: str = None,
bcc_recipients: str = None,
attachment_path: str = None
) -> None:
Send an email using Gmail API.
Args:
subject (str): The email subject.
body (str): The email body.
to_recipients (str): Comma-separated email addresses of the primary recipients.
cc_recipients (str): Comma-separated email addresses of the CC recipients. Default is None.
bcc_recipients (str): Comma-separated email addresses of the BCC recipients. Default is None.
attachment_path (str): Path to the file to be attached. Default is None (no attachment).
Returns:
message = MIMEMultipart()
message["subject"] = subject
message.attach(MIMEText(body, "plain"))
message["to"] = to_recipients
if cc_recipients:
message["cc"] = cc_recipients
if bcc_recipients:
message["bcc"] = bcc_recipients
if attachment_path:
attachment_name = os.path.basename(attachment_path)
attachment = MIMEBase("application", "octet-stream")
with open(attachment_path, "rb") as f:
attachment.set_payload(f.read())
encoders.encode_base64(attachment)
attachment.add_header("Content-Disposition", f"attachment; filename={attachment_name}")
message.attach(attachment)
raw_message = base64.urlsafe_b64encode(message.as_bytes()).decode("utf-8")
try:
response = self._gmail_service.users().messages().send(userId="me", body={"raw": raw_message}).execute()
except Exception as e:
logging.error(f"{e}\n{traceback.format_exc()}")
else:
logging.info(f"send email success, response: {response}")
7.发送邮件: 在发送邮件之前需要用户同意Google授权
if __name__ == "__main__":
GoogleEmail(client_secret_path="/path/to/client_secret.json").send(to_recipients="user@gmail.com", subject="hi", body="hello")
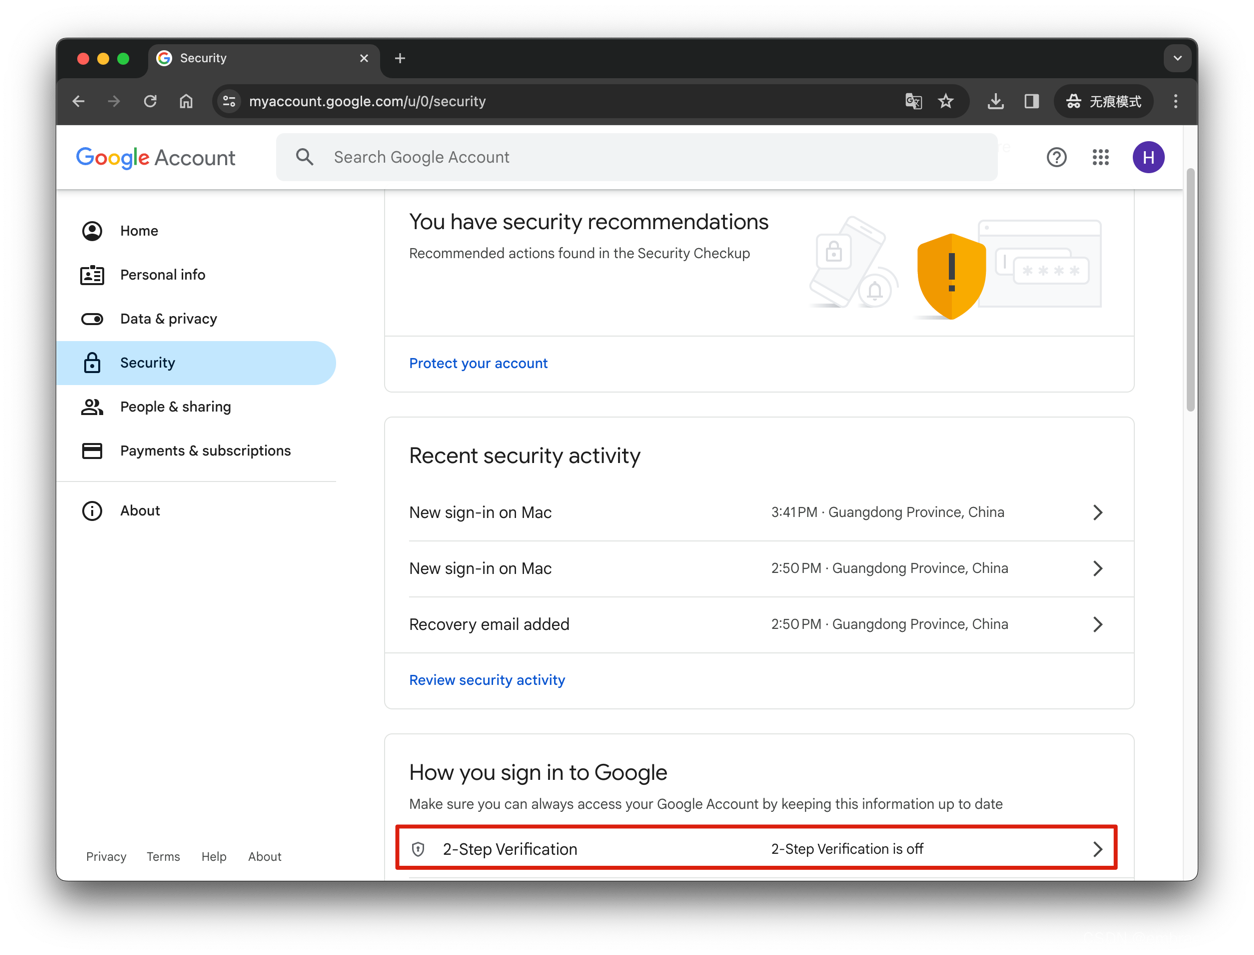
1.开启两步验证: 在Security页面开启两步验证

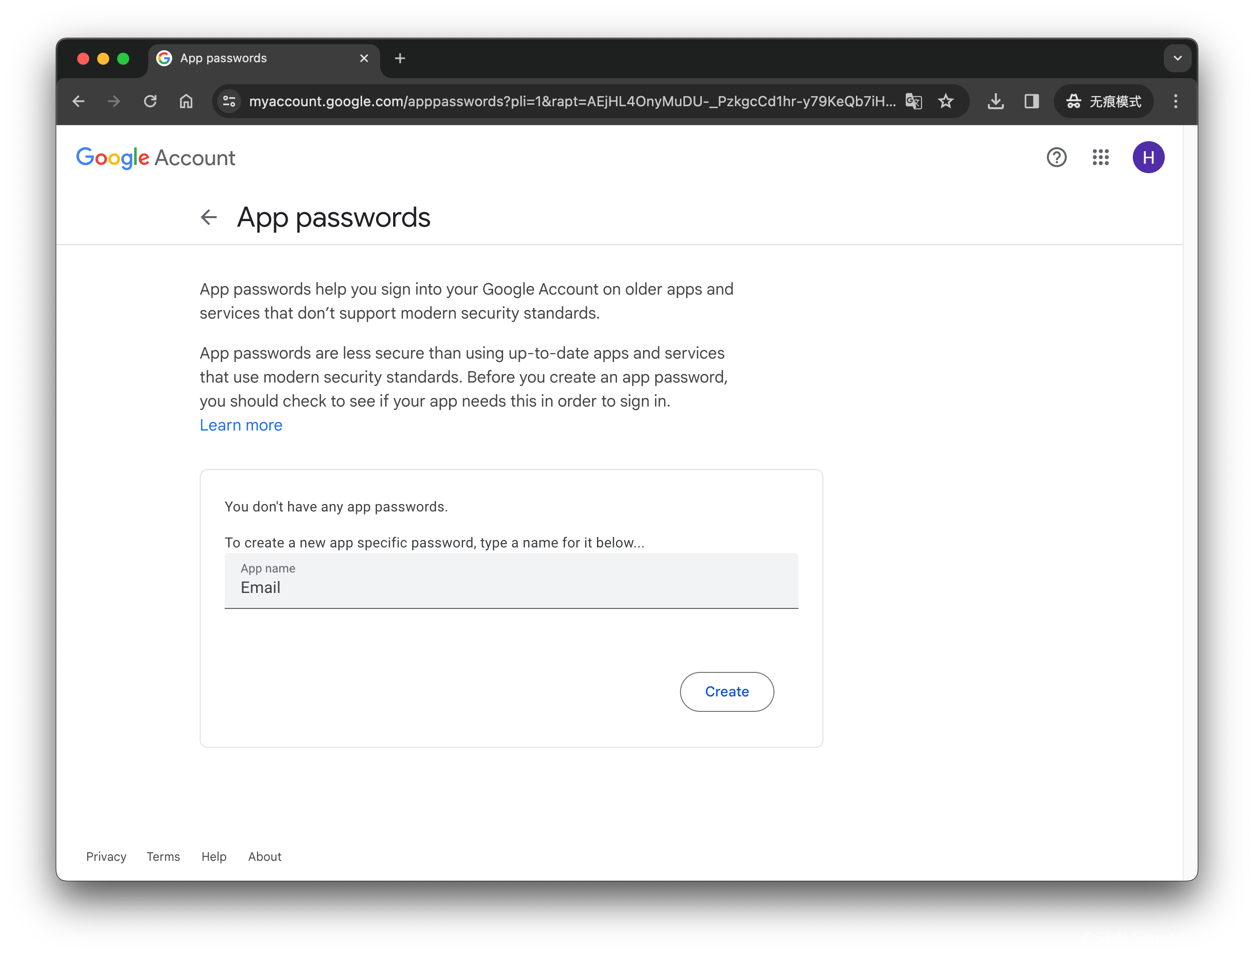
2.创建应用专用密码: 在应用专用密码页面输入名称即可创建

3.编写脚本: 不需要配置环境,直接使用Python内置的标准库即可
import logging
import smtplib
import traceback
from email.mime.text import MIMEText
from email.mime.multipart import MIMEMultipart
logging.basicConfig(level=logging.INFO)
class EmailNotification:
def __init__(self, sender: str, password: str, server: str, recipients: str) -> None:
Initialize the class.
Args:
sender (str): The email address of the sender.
password (str): The password of the email account of sender.
server (str): The SMTP server address.
recipients (str): Comma-separated list of email addresses of the recipients.
Returns:
self._sender = sender
self._password = password
self._server = server
self._recipients = recipients
def send(self, subject: str, body: str) -> None:
Send an email using Gmail API.
Args:
subject (str): The email subject.
body (str): The email body.
Returns:
msg = MIMEMultipart()
msg["Subject"] = subject
msg["from"] = self._sender
msg["to"] = self._recipients
msg.attach(MIMEText(body, "plain", _charset="utf-8"))
smtp= None
try:
smtp= smtplib.SMTP(self._server, 587)
smtp.starttls()
smtp.login(self._sender, self._password)
smtp.send_message(msg)
except Exception as e:
logging.error(f"{e}\n{traceback.format_exc()}")
else:
logging.info("send email success")
finally:
if smtp:
smtp.quit()
4.发送邮件: 将其中的password更换成应用专用密码(需要去掉其中的空格)
if __name__ == '__main__':
conf = {"sender": "sender@gmail.com",
"password": "password",
"server": "smtp.gmail.com",
"recipients": "recipient@gmail.com"}
EmailNotification(**conf).send(subject="hi", body="hello")
OAuth 2.0访问令牌和酒店房卡有什么共同点?酒店房卡与OAuth2.0 访问令牌是很相似的。 首先我们来用酒店的7个场景来更好的理解这个问题。
01用酒店的7个场景类比这个问题
01前台验证即可获得房卡(验证身份获取Token)在酒店前台办理入住手续,出示您的身份证,您会得到一张房卡,您可以使用它进入您的酒店房间。在 OAuth 中,应用程序将用户发送到他们进行身份验证的 OAuth 服务器(类似于在前台出示身份证),然后 OAuth2.0 服务器将向应用程序发出访问令牌(Token)。02任何可以
gmail-helper
允许使用Google的API客户端通过OAuth2 API进行有用的GMail任务
生成并存储credentials.json通过浏览创建您的谷歌帐户的OAuth用户端ID凭证并点击+ Create Credentials按钮
有关如何获取凭据json的详细信息在
用于创建邮件过滤器查询,可以使用
如果出于某种原因需要在配置中使用其他范围,则可以使用
基于由允许的GMail搜索条件,如的部分匹配永久删除邮件subject , to或from电子邮件地址字段(也允许只域匹配)。运行config提供的年份范围,范围为since_year和before_year 。
默认情况下,它先读取邮件,然后将其本地存储(除附件外)在按邮件年份分隔的sqlite DB中,然后删除
如何使用: python3 delete-mails.py ./config-yamls/del
GmailCli
GmailCli打包了关键工具,并添加了很多优点,使编写主要用于Gmail / GoogleApps的命令行实用程序变得更加容易。
当前涵盖的主要用例是使用OAuth2通过IMAP访问Gmail(个人和GoogleApps)。 它解决了确保无需手动干预即可刷新访问凭据的问题,这对于构建将作为计划或后台进程运行的事物而言至关重要。
这种宝石并没有做很多艰苦的工作-它主要是语法糖和包装,以方便使用。 繁重的工作由以下人员提供:
,它为Google IMAP和SMTP提供OAuth2支持
,这是提供OAuth2实用程序的官方Google API gem
将此行添加到您的应用程序的Gemfile中:
gem 'gmail_cli'
然后执行:
$ bundle
或将其自己安装为:
$ gem install gmail_cli
需要三个基本步骤
OAuth2.0是一种用于授权访问资源的协议,其应用场景非常广泛。以下是一些OAuth2.0的应用场景:
1. 第三方应用授权登录:许多网站和应用程序允许用户使用其Google、Facebook或Twitter等帐户登录。这些应用程序使用OAuth2.0来授权并访问用户的帐户信息。
2. API访问授权:许多服务提供商使用OAuth2.0来授权访问其API。例如,一些社交媒体平台允许开发人员使用其API来创建应用程序,OAuth2.0可以帮助管理这些应用程序的访问权限。
3. 移动应用程序授权:移动应用程序通常需要访问用户数据和云服务,OAuth2.0可以用来授权这些应用程序的访问权限,从而使用户可以控制其数据的使用。
4. 企业应用程序授权:许多企业使用OAuth2.0来授权其内部应用程序的访问权限。这些应用程序可以访问特定的资源,例如公司内部数据库。
综上所述,OAuth2.0可以用于任何需要授权访问资源的应用程序和服务,其应用场景非常广泛。


